Archive for October 2011
Sweet mole?
Posted on: October 25, 2011
I found some yarn/wool on sale at my local material shop. I’m not entirely sure what it’s called. It’s got the katakana ‘スイートモール’ and it also has in English ‘sweet mole’… BUT when I googled sweet mole the results were all recipes. People eat moles??!! Huh?
Anywho, on the inside of the paper sleeve it was wrapped in are directions for knitting a scarf, and that’s why I was googling it, to make sure I could use it for a scarf.
The pic on the label is insane, my scarf definitely isn’t going to look like that.
But I’ve started and it’s not as bad as my previous attempts. The wool/yarn (which?!) is like thin string with fluffy nobs evenly spaced along. SO it pretty much hides mistakes. And it’s way softer than this cheapo stuff I started with. So yay! I may actually knit a scarf. I’ve dedicated it to Winie, so it only needs to be small. Yay.


Stuffed toy
Posted on: October 20, 2011
Ahhhhhhh (sigh of relief)
So, I made my daughter an owl, it was probably the first project blossoming in my heart, but it took a while to find the fabric, not that I was looking for anything particular, I just wasnt really looking… I ended up buying some cute patterned fat quarters (don’t completely know what that means actually, but I think that’s what I got) I’ve learned that I didn’t use the right type of fabric, it’s not terrible, just too thin and not toy like. Probably didn’t use such great stuffing either, or maybe I stuffed it too much. I dunno.
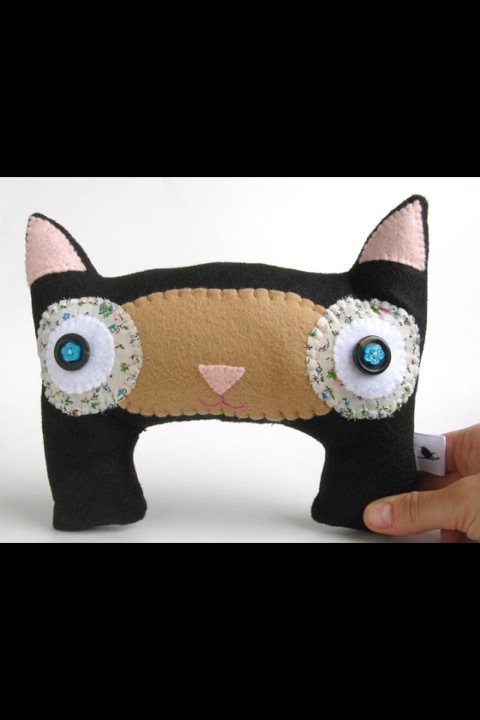
I was inspired by this very odd shaped cat I saw, it looked grab-able.
So I drew an owl over and over a few times and then went for it. I added 1-2cm for seam allowance but didn’t factor in fat allowance (stuffing dimension) And I drew it directly into the fabric and where Winie has chewed it the red ink is showing through… Woopsy! I hope the little bag I made turns out ok after they put it through the wash, I used blue to draw it.
So, the new me will make patterns on paper!!! Then pin, cut and iron seam allowance. Next time!
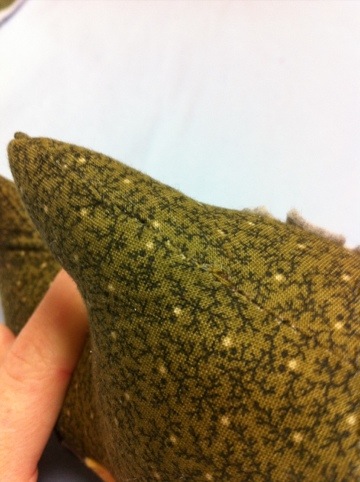
Also, hand stitching the felt eyes on… The grey layer, not so good, the stitches aren’t holding in the felt so well, I did them horizontal, hopefully the felt wont rip, but it is curling away from the stitch.
I took ALOT of pictures, I used one tutorial to sew the stuffing opening closed, highly recommend!
http://quilttaffy.blogspot.com/2008/07/invisible-closing-seam-tutorial.html?m=1
Ok, so the process in pictures!

Stole my own picture off the Internet.


I think I got better at taking more pictures as it progressed. I sewed the pink belly part on first, then beak, then eyes. Then I sewed the feet together, two pieces of felt with plastic between them so they make crinkly noises. I didn’t plan for the tail feathers, I was actually going to put them in the wings amoungst the ribbon but it didn’t look right. I stitched the ribbon in place and then sewed the pieces together. In hindsight, I’d put the opening to turn it through and stuff it somewhere else, I put it right near the top peak which made it a bit tricky to stuff that little point.
So I’ve learned SO much on this one.
Winie likes the feet, but she isn’t that interested, maybe when she is older and can appreciate the aesthetics! At the moment she loves plastic cups and spoons, so…..
Braining
Posted on: October 16, 2011
So. Thinking back to the days when I first learned me a little about sewing, and comparing that with my brain towards sewing today:
Ironing (seams etc) beforehand is TOTALLY worth it.
I used to haaaaaate that and think it was a waste of time. But when you actually care about what you are making, it’s a necessity. And totally worth the time.
The end.
Baby girl’s tote
Posted on: October 15, 2011
Ah. Finished! 出来上がる! So glad. And it looks half decent too. Ah, it took SO long. Again, I loosely used another tutorial:
http://mypatchwork.wordpress.com/2011/05/02/tote-bag-tutorial/
But I added a pocket and came across difficulties because of the fabric I used. I chose a quilted fabric, firstly coz it’s cute, but mainly coz I’m lazy and didn’t want to have to find and use interfacing. The fabric was great until it came to the bag straps. It had to be folded over 4 times and sewn together, it was almost too thick for the machine. But we got there.
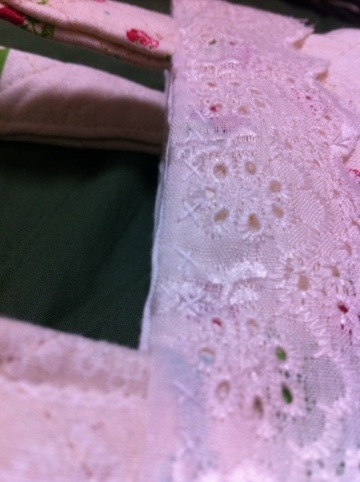
I brought lace type material for extra girliness and to fold out over the top, but it was super white compared to the off white of the fabric. Dilemma! BUT I remembered a friend once saying how she loves tea stained lace. So I gave it a tea bath, came out beautifully.
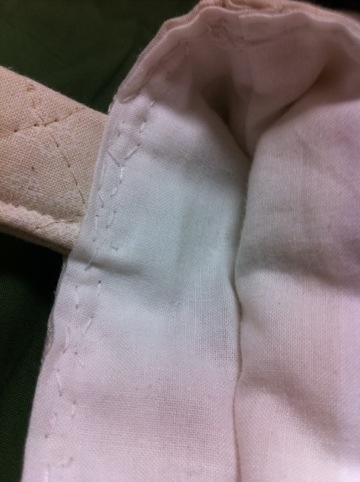
And the biggest hurdle was working out how to attach the lining. The bag ended up being pretty little and machine sewing the lining in was out of the question. So I hand sewed it. Little criss-cross stitches. Hopefully it will be strong enough. I’m thinking I may hand sew around it one more time. Just a plain stitch and I’ll try and make it as invisible as possible.


Perfect for a little girl?
Sewing spot
Posted on: October 14, 2011
I’m making a little tote bag for a 2yr old girl’s birthday present. Her birthday was last Sunday, so I’m hoping to get it done by this Sunday so I can give it to her at church. Today is Friday and my daughter is having her nap, ideal time to sew right now but I just wanna vege out…
Anyway, I took a shot of my ‘sewing station’ the other day. We don’t have much room in our tiny Japanese apartment so this is in our bedroom between our bed and closet (can you see the bed on the right) A friend gave me the sewing machine, I’m not even sure whether it’s a good one or not. Another friend gave me the wool and knitting needles… And I was able to discover that knitting is indeed not for me!

I wasn’t sewing at the time I took the photo, hence the sketch pad, sunglasses and MacBook on the table. When I’m sewing they all go on the bed.
Birthday owl
Posted on: October 12, 2011
So I made a little owl accessory thingy today. I’d already cut out a bigger version for my daughter and I decided to trial a smaller one first. I’m going to give it to my friend for her birthday.
At first I didn’t leave a big enough hole to turn it inside out and I’d sewn the eyes into the side hems and I’d sewn the tag/hangy part on the inside, so I had to unpick and start again. Maybe that’s my style?
I hand stitched on the beak and eyes. I hand stitch the opening for stuffing closed, but I think I need to learn better ways to do it. Invisible way.


Leggings
Posted on: October 8, 2011
Wow. I made leggings. I used this weird foot which is like a huge rectangle… It’s kinda like a training wheel for sewing straight, best foot EVER!
Took about 2 hrs to sew. Lots of unpicking. One leg is longer and slightly wider than the other, but I don’t care!! I planned for the legs to be longer than the original pair so they’d scrunch up a bit.
I used an old pair of my leggings, so I kept the hem and one of the side seems on both legs.
I’m super proud of myself.
I loosely used this tutorial :
http://www.makeit-loveit.com/2011/09/super-simple-leggings-only-2-fabric-pieces.html
Sorry I’m not so computer savvy to be able to make a simple link thingy yet.
Ok so those leggings, well the wonderful rectangular foot (my training wheel) meant I could only do normal stitch. When I finished with the leggings and Winie tried them on I realized they were really stiff. I tried to stretch them and the seams broke. So I had to start ALL over again. I tried zigzag with my training wheel foot and I’d get half way and the thread would fray… I did it at least twice on both sides before realizing I’d need to use the zigzag foot. I did SO much unpicking holy woah.
Anyway in the end I just went for it, finished them off pretty fast, wasn’t too bothered with detail. Because I used the original seam on the outside of the leg and the original hem the main part people saw looked really good.
And because I had to start all over again I was more careful and the legs ended up the same length. But one is wider.
UPDATE! my training wheel foot is called a button hole foot…

First attempt. Notice the leg on the right is longer. Ha. I used the brown pair to cut out the fabric.
I need to get a ruler and paper and stuff and cut straighter and more accurately measured!

The outfit


Completion
Welcome
Posted on: October 6, 2011
Ahh. A new blog. A sewing blog of sorts.
So here’s the story, I have an 8month old daughter and I went crazy buying her newborn clothes and she grew out of them like crazy. I researched baby toys and wanted to get her a taggie blanket thingy but couldn’t find one in Japan. Then I daydreamed about making her toys, clothes etc and my dreams grew.
I learned some basic sewing skills in grade 7&8, I made an apron, silk boxer shorts and a wrap skirt. It wasn’t really for me, I was too impatient and the teacher ended up finishing the apron and the shorts for me HA.
Anywho, I randomly mentioned on Facebook how I wished I had a sewing machine, how I’d like to learn to knit and crochet too. And a friend offered me her machine! WIN! (another friend gave me some wool and knitting needles… Long story short I can’t stand knitting)
So then I went crazy finding free patterns and tutorials online and bookmarking them. I have a huge arsenal for when I finally get sewing.
Why am I not sewing yet, you ask… The machine doesn’t have just a regular foot. I still gotta learn all the technical lingo etc etc. But basically the machine has a foot attachment that’s for zigzagging, so when I reverse stitch/back stitch it rips holes in the material.
Anyway, 13yrs since I sewed and I set the machine up, threaded it and even threaded a bobbin! But haven’t sewn any complete thing together yet. Oh.
BUT! I’ve cut out and pinned together 3 projects so far.
A dress (summer dress, but now it’s autumn 😦 an owl soft toy and leggings)
The sewing/material/haberdashery store in my little town doesn’t have feet/attachments for my type of machine… So there’s a halt.
But I’m trying to keep my motivation up. Hence this blog.
She shops around for the best yarns and cottons, and enjoys knitting and sewing. (Proverbs 31:13 MSG)
Hmmm. Dunno about the knitting part… Maybe I’ll have to keep at it? After all, it is biblical.
